ovftool 4.2 export syntax

Hope this saves you an hour!  I was attempting to use ovftool to export a VM from VMware vCenter vs. using the Web Client.  I’m learning to use various CLI (command line interface) vs. UI.    I spent a while and here is what I learned.  Hope this helps.

#%5c is a escape character for when using Active Domain user authentication
#The password does not contain special characters
#The VM names don’t contain spaces (simple)
#The minimum vCenter permissions is export OVF App
C:Program FilesVMwareVMware OVF Toolovftool -noSSLVerify “vi://domain%5cuser:[email protected]/DataCenter/vm/Templates/VMName-Not-Template-Prefer-No-Spaces-In-Name” C:tempOutput.ovf

VMware, Harbor container registry

Containers are all the rage, they will solve all your problems.  Hint of sarcasm there….Write once, run everywhere!? Ever heard statements like this?  (*cough* java *cough).  In my IT career, technology forecasters like to predict what will impact things. Technology disrupts itself every so many years.

Containers is a technology I’m personally excited about.  My current role has me involved in cloud automation, including an interesting look at container technology.   One of the items a private cloud should have is a private, trusted registry.

Regardless, if you use a public source code repository hosting your private registry, using Docker Enterprise or something else.  Trust, is a BIG factor, with as many security breaches common place these days, security has to be on the forefront.  I’m sure there are other options and if I’m missing something, feel free to contact me on twitter @steveschofield

VMware offers a free open source registry called Harbor .  Anyone can setup and configure, either on-prem or hosted in public cloud.  My blog post contains notes, config settings and my adventures along the way.  My hope is you evaluate all options when evaluating a trusted registry for your company.

I don’t confess to be an expert knowing everything there is to know about setting up the right architecture supporting containers.  When in doubt, start a proof of concept and evaluate various tools.   This gives people an opportunity to geek and learn, which is why I enjoy the IT field.

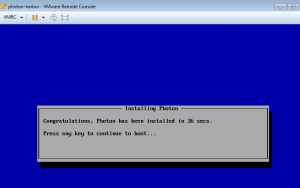
I used a Photon OS provided by VMware.  It’s an OS offering docker engine built-in.  Other OS’s can run Docker, I just chose for starters to help me learn more about the OS.

Download full ISO from
https://vmware.github.io/photon/

  • Install photon minimal with partition big enough to store your images.  Still have to figure how to use external storage so it can be expanded.

I learned DNS setting needs a space so systemd-resolved.service will properly configure the /etc/resolv.conf The /etc/resolv.conf is automatically managed by systemd-resolved.service.

https://github.com/vmware/photon/blob/master/docs/photon-admin-guide.md

#Add static networks
root@photon-harbor [ ~ ]# vi /etc/systemd/network/10-static-eth0.network
[Match]
Name=eth0
[Network]
Address=1.1.1.111/24
Gateway=1.1.1.1
DNS=1.2.3.4 5.6.7.8
Domains=example.com

#Upload or create Docker networking files
SCP upload docker network files in /etc/systemd/network

OR

Create file called 10-static-docker0.netdev in /etc/systemd/network
[NetDev]
Name=docker0
Kind=bridge

Create file called 10-static-docker0.network in /etc/systemd/network
[Match]
Name=docker0
[Network]
Address=192.168.3.0/24

#Change permissions on static ip
#chmod 644 /etc/system/network/*

root@photon-harbor [ /etc/systemd/network ]# ls -l
-rw-r-r- 1 root root 34 Dec 29 00:18 10-static-docker0.netdev
-rw-r-r- 1 root root 54 Dec 29 00:19 10-static-docker0.network
-rw-r-r- 1 root root 129 May 8 17:00 10-static-eth0.network#Add icmp at bottom of file

# Open /etc/systemd/scripts/iptables, add to bottom
# Add ability to response to icmp pings

iptables -A INPUT -p icmp -j ACCEPT

#Enable root login
vi /etc/ssh/ssh_config
PermitRootLogin yes
Restart services to apply changes from above

#restart ssh
systemctl restart sshd

#firewall
systemctl restart iptables

#restart network and dns daemons
systemctl restart systemd-networkd.service
systemctl restart systemd-resolved.service

Docker section

#Remove existing Docker install on Photon OS, which is version 1.1.x
root@photon-harbor [ /etc/systemd/network ]# tdnf erase docker
Removing:
docker x86_64 1.13.1-3.ph1 80.46 M

Total installed size: 80.46 M

Is this ok [y/N]:y

Testing transaction

Running transaction
Complete!

root@photon-harbor [ /etc/systemd/network ]#

#Install Docker Compose
curl -L https://github.com/docker/compose/releases/download/1.13.0/docker-compose-`uname -s`-`uname -m` > /usr/local/bin/docker-compose

chmod +x /usr/local/bin/docker-compose

#Install TAR and GZIP packages
tdnf install -y tar gzip

#Download latest version of Docker
#Run from command line
curl -fsSLO https://get.docker.com/builds/Linux/x86_64/docker-17.04.0-ce.tgz && tar -strip-components=1 -xvzf docker-17.04.0-ce.tgz -C /usr/bin

#Add user and automatic startup files.

============================================
groupadd -r docker
============================================

echo ‘[Unit]
Description=Docker Application Container Engine
Documentation=https://docs.docker.com
After=network.target docker.socket
Requires=docker.socket
[Service]
Type=notify
ExecStart=/usr/bin/dockerd -H fd:// -s overlay2
ExecReload=/bin/kill -s HUP $MAINPID
LimitNOFILE=infinity
LimitNPROC=infinity
LimitCORE=infinity
TasksMax=infinity
TimeoutStartSec=0
Delegate=yes
KillMode=process
[Install]
WantedBy=multi-user.target
‘ > /etc/systemd/system/docker.service

============================================
echo ‘[Unit]
Description=Docker Socket for the API
PartOf=docker.service
[Socket]
ListenStream=/var/run/docker.sock
SocketMode=0660
SocketUser=root
SocketGroup=docker
[Install]
WantedBy=sockets.target
‘ > /etc/systemd/system/docker.socket

Reboot VM

Run these two commands after reboot of Photon OS
• systemctl enable docker
• systemctl start docker

Harbor Installation
https://github.com/vmware/harbor/blob/master/docs/installation_guide.md

#Upload / offline files (link to download is listed reference links)
• Create /var/opt/harbor
• chmod -R 777 /var/opt/harbor/
• Edit harbor.cfg (see raw config listed below)
• Run /var/opt/harbor/install.sh

#Create /etc/nginx folder and add sym link for nginx.conf
• root@photon-harbor [ /var/opt/harbor ]# mkdir /etc/ngnix
• root@photon-harbor [ /var/opt/harbor ]# ln -s /var/opt/harbor/common/config/nginx/nginx.conf /etc/ngnix

#Reference links, misc commands
• https://github.com/vmware/photon/blob/master/docs/photon-admin-guide.md#default-firewall-settings
http://www.virten.net/2015/04/basic-commands-for-vmware-photon-and-docker/
http://vmware.github.io/harbor/
https://github.com/vmware/photon/issues/588
https://github.com/moby/moby/issues/26237

Slack Channel on VMware Code
vmwarecode.slack.com
  (subscribe to the harbor channel)

Restart all docker containers
• docker restart $(docker ps -a -q)
• docker-compose up -d docker-compose.yml (to start up after a reboot)

Harbor.cfg
## Configuration file of Harbor

#The IP address or hostname to access admin UI and registry service.
#DO NOT use localhost or 127.0.0.1, because Harbor needs to be accessed by external clients.
hostname = harbor.example.com

#The protocol for accessing the UI and token/notification service, by default it is http.
#It can be set to https if ssl is enabled on nginx.
ui_url_protocol = http

#The password for the root user of mysql db, change this before any production use.
db_password = changeme

#Maximum number of job workers in job service
max_job_workers = 3

#Determine whether or not to generate certificate for the registry’s token.
#If the value is on, the prepare script creates new root cert and private key
#for generating token to access the registry. If the value is off the default key/cert will be used.
#This flag also controls the creation of the notary signer’s cert.
customize_crt = on

#The path of cert and key files for nginx, they are applied only the protocol is set to https
ssl_cert = /data/cert/server.crt
ssl_cert_key = /data/cert/server.key

#The path of secretkey storage
secretkey_path = /data

#Admiral’s url, comment this attribute, or set its value to NA when Harbor is standalone
admiral_url = NA

#NOTES: The properties between BEGIN INITIAL PROPERTIES and END INITIAL PROPERTIES
#only take effect in the first boot, the subsequent changes of these properties
#should be performed on web ui

#************************BEGIN INITIAL PROPERTIES************************

#Email account settings for sending out password resetting emails.

#Email server uses the given username and password to authenticate on TLS connections to host and act as identity.
#Identity left blank to act as username.
email_identity =

email_server = smarthost.example.com
email_server_port = 25
email_username =
email_password =
email_from = Harbor <[email protected]>
email_ssl = false

##The initial password of Harbor admin, only works for the first time when Harbor starts.
#It has no effect after the first launch of Harbor.
#Change the admin password from UI after launching Harbor.
harbor_admin_password = changeme

##By default the auth mode is db_auth, i.e. the credentials are stored in a local database.
#Set it to ldap_auth if you want to verify a user’s credentials against an LDAP server.
auth_mode = ldap_auth

#The url for an ldap endpoint.
ldap_url = ldap://ad-ldap.example.com

#A user’s DN who has the permission to search the LDAP/AD server.
#If your LDAP/AD server does not support anonymous search, you should configure this DN and ldap_search_pwd.
#ldap_searchdn = uid=searchuser,ou=people,dc=mydomain,dc=com
ldap_searchdn = CN=LDAPUser,OU=LDAP,DC=example,DC=com

#the password of the ldap_searchdn
#ldap_search_pwd = password
ldap_search_pwd = changeme

#The base DN from which to look up a user in LDAP/AD
ldap_basedn = dc=example,dc=com

#Search filter for LDAP/AD, make sure the syntax of the filter is correct.
ldap_filter = (objectClass=person)

# The attribute used in a search to match a user, it could be uid, cn, email, sAMAccountName or other attributes depending on your LDAP/AD
ldap_uid = sAMAccountName

#the scope to search for users, 1-LDAP_SCOPE_BASE, 2-LDAP_SCOPE_ONELEVEL, 3-LDAP_SCOPE_SUBTREE
ldap_scope = 3

#Timeout (in seconds) when connecting to an LDAP Server. The default value (and most reasonable) is 5 seconds.
ldap_timeout = 5

#Turn on or off the self-registration feature
self_registration = on

#The expiration time (in minute) of token created by token service, default is 30 minutes
token_expiration = 30

#The flag to control what users have permission to create projects
#The default value “everyone” allows everyone to creates a project.
#Set to “adminonly” so that only admin user can create project.
project_creation_restriction = everyone

#Determine whether the job service should verify the ssl cert when it connects to a remote registry.
#Set this flag to off when the remote registry uses a self-signed or untrusted certificate.
verify_remote_cert = on
#************************END INITIAL PROPERTIES************************
#############

This entire file is the docker-compose.yml file that ships with the harbor install, thanks to the Slack harbor channel, Sean as well as others from VMware, helped me get this up and going.  

Docker-compose.yml – add bolded section to base docker-compose.yml file to have custom networks
version: ‘2’
services:
log:
image: vmware/harbor-log:v1.1.1-rc3
container_name: harbor-log
restart: always
volumes:
– /var/log/harbor/:/var/log/docker/:z
ports:
– 127.0.0.1:1514:514
networks:
– harbor
registry:
image: vmware/registry:photon-2.6.0
container_name: registry
restart: always
volumes:
– /data/registry:/storage:z
– ./common/config/registry/:/etc/registry/:z
networks:
– harbor
environment:
– GODEBUG=netdns=cgo
command:
[“serve”, “/etc/registry/config.yml”]
depends_on:
– log
logging:
driver: “syslog”
options:
syslog-address: “tcp://127.0.0.1:1514”
tag: “registry”
mysql:
image: vmware/harbor-db:v1.1.1-rc3
container_name: harbor-db
restart: always
volumes:
– /data/database:/var/lib/mysql:z
networks:
– harbor
env_file:
– ./common/config/db/env
depends_on:
– log
logging:
driver: “syslog”
options:
syslog-address: “tcp://127.0.0.1:1514”
tag: “mysql”
adminserver:
image: vmware/harbor-adminserver:v1.1.1-rc3
container_name: harbor-adminserver
env_file:
– ./common/config/adminserver/env
restart: always
volumes:
– /data/config/:/etc/adminserver/config/:z
– /data/secretkey:/etc/adminserver/key:z
– /data/:/data/:z
networks:
– harbor
depends_on:
– log
logging:
driver: “syslog”
options:
syslog-address: “tcp://127.0.0.1:1514”
tag: “adminserver”
ui:
image: vmware/harbor-ui:v1.1.1-rc3
container_name: harbor-ui
env_file:
– ./common/config/ui/env
restart: always
volumes:
– ./common/config/ui/app.conf:/etc/ui/app.conf:z
– ./common/config/ui/private_key.pem:/etc/ui/private_key.pem:z
– /data/secretkey:/etc/ui/key:z
– /data/ca_download/:/etc/ui/ca/:z
networks:
– harbor
depends_on:
– log
– adminserver
– registry
logging:
driver: “syslog”
options:
syslog-address: “tcp://127.0.0.1:1514”
tag: “ui”
jobservice:
image: vmware/harbor-jobservice:v1.1.1-rc3
container_name: harbor-jobservice
env_file:
– ./common/config/jobservice/env
restart: always
volumes:
– /data/job_logs:/var/log/jobs:z
– ./common/config/jobservice/app.conf:/etc/jobservice/app.conf:z
– /data/secretkey:/etc/jobservice/key:z
networks:
– harbor
depends_on:
– ui
– adminserver
logging:
driver: “syslog”
options:
syslog-address: “tcp://127.0.0.1:1514”
tag: “jobservice”
proxy:
image: vmware/nginx:1.11.5-patched
container_name: nginx
restart: always
volumes:
– ./common/config/nginx:/etc/nginx:z
networks:
– harbor
ports:
– 80:80
– 443:443
– 4443:4443
depends_on:
– mysql
– registry
– ui
– log
logging:
driver: “syslog”
options:
syslog-address: “tcp://127.0.0.1:1514”
tag: “proxy”
networks:
harbor:
external: false
driver: bridge
ipam:
driver: default
config:
– subnet: 192.168.150.0/20
gateway: 192.168.144.1

To-do’s

  • Figure out notary sample
  • How to host images on external storage.
  • How to setup HTTPS

Enjoy

Steve Schofield

#vExpert 2017
http://vsteve.me

48 hours with VMWare Photon, Powershell-core, PowerCLI-core

Early in my career, I had the privilege to work with .NET framework betas (2000) (has it really been 17 years?!)  I also have a distinct claim of running one of the first sites on the internet to run ASP.NET (PDC 2000).  As well as participating in the ASP.NET beta, I became familiar with .NET framework.  I had the pleasure to work through several Microsoft betas including .NET, ASP.NET and win2003, 2008, 2012 betas.   My career included a brief stint as an Exchange admin, this was the first major product using PowerShell as a user interface as well as automation leveraging PowerShell.

Before Powershell, VBScript or JavaScript were the scripting languages I used.  I started a job in 2008, PowerShell was the main scripting language we used for automation. It took a few months to get accustomed to PS.   Enough reminiscing….

Fast forward to 2015, I took a position being a VMware admin, it was a career change.  After several years of Microsoft betas, 14 years as a MS MVP (ASP.NET / IIS).  The only thing that resembled my previous job was PowerShell / PowerCLI  I was thankful for something that transferred from my previous role, this helped contribute when starting a new position.

In 2017, it’s been approximately three years since become a vmware admin,  VMware released Photon as a minimum Linux distro, mainly as a Docker host.  VMware is also using Photon as an OS for appliances such as vSphere (vCenter).  It boots fast!

I stumbled across a post with some instructions potentially running PowerShell-Core and PowerCLI-core on Photon.  The weather was miserable in MI, so what the heck, time to get my geek on.  I tried PowerCLI-core via a Docker Container as well as installing PowerShell-Core, PowerCLI-core on a Photon host.  I’ve included links below, I used for reference.

I’ve concluded the enhancements are awesome, it’s great for geeking around, For now, I’ll continue using a Windows OS with PowerShell for a PowerShell host and vRealize Automation.  It was awesome to learn, for specific VMware PowerCLI usage,   I can use a Photon Host and either an installation of PowerShell-core, PowerCLI-core or a Docker container.

To get the docker container,  check out the Docs site for PowerCLI core

  • SSH to the Photon instance
  • Run systemctl start docker
  • Run systemctl enable docker
  • docker pull vmware/powerclicore
  • docker run -rm -it vmware/powerclicore

Links to get started with.

I’m impressed to see how far Microsoft has come with opening their systems.  In the early days Scott Guthrie paved the way for a more open Microsoft.  That has accelerated 100 fold and with Jeffrey Snover as Godfather of PowerShell.  Alan Renouf from VMware has championed PowerCLI.

I appreciate all efforts and enjoy the merging of technologies.  End of the day, I can see open source continuing to push forward.  I’ll circle back in a few months and see how things are going with these technologies.

My one takeaway will be to deploy the Docker Container and use on-demand via a vRealize Automation Catalog item.

Here are screenshots

This shows Photon and Powershell installed

capture

This shows PowerShell modules loaded,

The load the VMware modules.

capture2

48 hours concluded!  Time well spent, hope this inspires you to at least try it!

PS – you may wonder why I want MS technologies on a Linux OS, because it’s cool!

Steve Schofield
vExpert 2017

http://vsteve.me

Upgrade vRA 7.1 to 7.2 journey

Challenges are one of the reasons that keeps my interest in IT.  I’ve supported many products in my career.  Every product I’ve supported have one thing in common…..UPGRADES..  ( Typed that in upper case on purpose).

There are couple strategies to upgrades.

  • Blue / green deploys, a recent cloudy term to stand up new, deploy, test and cutover.   Before this was a term, I prefer this method.  If there is an issue, it’s easy to revert to original environment.
  • In-place upgrade of existing environment.  This is NOT my favorite method, but necessary sometimes.

This post shares experiences on a recent upgrade from vRealize Automation 7.1 to 7.2.    These are my notes, they include links to formal documentation, which in my experiences with any product, there are a few tips / tricks between the lines docs don’t cover.  I’ve included my raw notes below.  I hope this helps in your adventure.

I was fortunate enough to have a separate environment to test before doing the real environment.  Since this was an in-place upgrade, going through the experience helped prepare what to expect, as well as to revert back to original environment.

With the magic of cloning Linux appliances, snapshots on IaaS windows machines, and a SQL Server backup.  It helped simulate the ability to go back to original infrastructure.  It’s doesn’t make me as comfortable standing up new, but was better than no backout plan at all.

  • Read the upgrade docs, search forums for others reporting issues
  • Test the upgrade multiple times.  Also, think about if something goes wrong, how to revert to original version.  Do this multiple times until you are sick of it, that means you’ll be prepared
  • Have backups, clones and use snapshots on windows machines
  • Disable Backups before starting.  Contention on machines could cause issues
  • If you have support with VMware, open a proactive case and have them review your environment.
  • Clean-up any un-submitted requests
  • Clean-up any In-Progress requests that are orphaned
  • Give yourself 4 to 8 hours.  Communicate to your end users.  (Under promise, over deliver)
  • Coordinate with your users to test use cases after upgrade
  • Remember external systems like vRealize Business, Log Insight that access vRA.
  • Make sure end users disable automated build requests.

Here are my raw notes including links including  steps I followed.   These were reminders to help the overall process, the order of operations.  I’ve found having these types of notes help to refer to.

Prep work, review documents and blog posts.

Items I did as prep work.

Launch config using the command: java.exe -jar <vRPT Jar file> config

  • Download updated management agent. KB article with updated management agent, Workaround issue on upgrade on IaaS components
    http://kb.vmware.com/kb/2147926

Load-balancing

The network guys will wonder, what?!  Mine did, just tell them the vendor requires the change, double and triple check this step.

Cloning each machine vRA to upgrade

  • Turn off vRA appliances – Clone each machine (good to have backups of original appliances)
  • Turn off IaaS machines, snapshot.
  • Turn on all machines, verify services both IaaS and vRA are healthy (both appliances) I learned by testing if you clone windows, I see extra machines in the VAMI you’ll see “several called clone”
  • https://<vra-url>:5480/#cafe-services (make sure all services are started)
  • Close any opened files in the pgdata directory and remove any files with a .swp suffix. (on primary vRA appliance)
    -/var/vmware/vpostgres/current/pgdata/
  • Backup SQL Server database (Get with DBA to schedule ahead of time)
  • Upload ISO to datastore, mount to primary and secondary appliances if you don’t have internet access for updates.
  • Adjust settings in VAMI on primary and secondary to use cd-rom
  • ***- Run on a remote machine well connected to network, not laptop on wireless***
  • ***Disable vCenter backups on the cluster so snapshots aren’t taken***
  • De-register vRB via vRB appliance (because we haven’t used it yet) – might not apply to you.
  • Run update on primary (Look for text similar listed below when completed)
  • Reboot primary and secondary vRA appliances after upgrade completed
  • Verify both appliances upgraded
  • Deploy updated Management agent on IaaS machines
  • Deploy updated java (version 1.8)
  • Reboot each IaaS machine
  • Verify services on IaaS and appliances are healthy
  • Create upgrade.properties on primary ( Backup file = cp -p upgrade.properties upgrade.properties.password)
  • run ./upgrade (cross your fingers) – I had to run three times and my install FINALLY upgrade all six windows machines.

Raw text after upgrade
Version 7.2.0.381 Build 4660246

Last Check:
Tuesday, 2017 January 31 15:46:07 UTC-5 (Using update CD found on: /dev/sr0)

VA-check: finished

Pre-install: finished

After all appliances are upgraded, ssh to the master appliance and go to /usr/lib/vcac/tools/upgrade. Populate all the required data in upgrade.properties and execute ./upgrade script

Replica nodes are upgraded successfully. Reboot master node to trigger the reboot of replica nodes

Post-install: finished

Update finished successfully.
WARNING: Immediately update any vRealize Automation IaaS nodes after reboot to avoid product version mismatches.

Last Install:
Tuesday, 2017 January 31 16:29:07 UTC-5

VA-check: finished

Pre-install: finished

After all appliances are upgraded, ssh to the master appliance and go to /usr/lib/vcac/tools/upgrade. Populate all the required data in upgrade.properties and execute ./upgrade script

Replica nodes are upgraded successfully. Reboot master node to trigger the reboot of replica nodes

Post-install: finished

Update finished successfully.
WARNING: Immediately update any vRealize Automation IaaS nodes after reboot to avoid product version mismatches.

Hope this helps,

Steve Schofield
#vExpert 2017

@steveschofield
http://vsteve.me

Getting used to web client only world…Using VMware HTML 5 fling….

Looking for some hope?  This post hopefully will make you smile, give you some hope.  Grab your favorite beverage and let’s begin.  I’ve been working in an environment with multiple vCenters.   Many were either 5.5 or 6.0.   We still had access to the famed ‘full C# client’, even though the Flash Client was available, many didn’t use and would continue to use C# client until we were forced to change (me included).

For long-time admins, the full client is like comfort food or that favorite beverage they are used to, don’t make me change. With anything in IT, change is part of the job.

In one evening, we upgraded multiple (5) vCenters to 6.5, putting the C# out to pasture.  On one hand, we were thrilled the upgrades and migrations from windows to appliance worked (couple bumps, but we were able to get past).  for those wondering what bumps, we had to remove / re-add the PSC to Active Directory.

On the other hand, there was a small empty feeling.  I try look at the bright side in any situation. ( I really do although there are others who would disagree).

As part of the 6.5 rollout, there is two clients.

  • The Flash client (full functionality and some stresses to using it!)
  • The new HTML 5 shiny client

The links are accessible within the landing page when navigating to the vCenter by name. I’ll give VMware credit putting the wording (partial functionality) on the landing page.   This blog post isn’t here to debate Flash vs HTML5, that has been settled elsewhere.  Remember, this blog post is about giving hope. ?

html5-1

Did I say this blog post was about providing some hope.

Dennis Lu apparently likes taking on big challenges.  He is a frequent contributor and main person for something called HTML 5 fling (more info here)  For those unaware or haven’t checked this in a while, it’s grown up.

As part of our rollout, I deployed a separate HTML 5 fling appliance. The appliance is used on more frequently used vCenters accessed by customers. Plus, you can give the appliance a handy DNS name. We call ours vhtml.example.com (have to get a little “v” in the name)

When I first explored the HTML 5 fling, the appliance required a re-deploy every time. Although the HTML 5 fling was “kewl”, it wasn’t functional enough to use in our environment.

Fast forward, the current release is 3.9 as of this blog post. A few weeks ago, I deployed the 3.3x release appliance.  I’ve used the update feature twice without issues (remember to snapshot before upgrade).  Good Job Dennis and crew!  Handy feature here.

html5-2

To access this functionality, go to https://<ApplianceIPorName>:5490 (note 5490, not 5480 like I type a few times).  Login and click update.

The update will take a few minutes.  I noticed the finalized update status appears to not always notify when done..   I waited a few minutes and refreshed my browser (Chrome is my preferred one).

Here is a screenshot of the update in progress.

html5-3

The reason we deployed the extra appliance was to give ability to have a client end users could access, that gets updated more frequently than the HTML 5 client hosted on the vCenter appliance.

To update the HTML 5 hosted on vCenter, requires an upgrade as far as I know.  Would be handy to do it separately from a vCenter upgrade.  (@VMware hint hint!)

We generally try to limit upgrading vCenter to once or twice a year.  Using an external appliance, we get new features faster, safer with less hassle and risk upgrading vCenters.

I hope you enjoyed this slice of hope, there is part of me that misses the C# as my every day tool, we have a couple of vCenters it still works on, although there is little need to access them regularly.

Thanks Dennis and team for providing this option.  It’s made the transition a little less painful.  The disclaimer is use at your own risk, test in a non-production environment first.

PS – The appliance appears it needs internet access, so you’ll have to check with the security group or whoever manages the firewalls to download updates. I’m not sure if there is a way to do offline updates to an existing appliance, probably a reload is required.

Enjoy,

Steve Schofield
#vExpert 2017

@steveschofield
http://vsteve.me

What is this section for?  It’s a separate way to share ideas to pass along that I thought of while typing my blog post.  If you know some of the answers, I’m on twitter at @steveschofield

  • Love to have the appliance automatically redirect port 80 to 443.  We have to type in https:// (maybe a browser issue now HTTPS is more common)
  • Ability to externalize web client on multiple machines, load-balance vs. being a single point of failure + the authentication window that appears on a Platform service controller
  • Update HTML 5 client / Flash web client separately from vCenter appliance
  • Single Appliance access multiple, separate vCenters hosted in separate SSO domains.


Change Docker default network to persist reboots and vRealize Automation 7.2

image

Containers are coming to a company near you! Containers are all the rage.  They are one of the hottest technologies in IT.  In all seriousness, all technologies have to mature, fit a business need.  Docker is a leading company in this space.

Within vRealize Automation 7.2, there is a container option.  Here are docs about containers and vRealize Automation 7.2.   As a vRA admin, I want to understand all features.  To help achieve my goal, I wanted to setup a catalog item similar to these articles.

Mark’s article was very helpful.   His article uses a DHCP scope (which is ok) and default networking in Photon assumes DHCP.  My article uses a vRO workflow, script on the template to set networking based on ip settings handled by vRA.

My article is related to vRealize Orchestrator, but the concept is the same.  Maybe I’ll blog my Photon example later although it’s similar to Mark’s article.   Here are my Photon workflows and addnetwork.sh I used on Photon vRA example

Regardless of how you setup your template, one of the features of Docker has it’s own internal networking.  The default is 172.17.0.0  (more info here). For some enterprises, this can conflict with existing non-routed internet address ranges ( 10.x, 172.x, and 192.168.x).

I ran into this and needed to adjust my default docker network.   My docker network wouldn’t persist reboots.  I initially found out how to change default docker network, but it wouldn’t persist a reboot.  (Links are listed below)

I wanted to setup my Photon template, used by vRA, with a persistent docker network that wouldn’t revert back to 172.17.x.x after reboots.  Follow Marks or my article to setup a Photon template, catalog items in vRA, then adjust your Photon template using instructions below.

After working with VMware and some experimentation.  This worked for me.

Photon OS use systemd-networkd to manage the network. Here is the external documentation on how to setup a bridge with systemd-networkd: https://wiki.archlinux.org/index.php/Systemd-networkd#Bridge_interface

Following steps:

# cd /etc/systemd/network
# vi 10-static-docker0.netdev

[NetDev]
Name=docker0
Kind=bridge

# vi 10-static-docker0.network

[Match]
Name=docker0
[Network]
Address=192.168.3.0/24

# chmod 755 10-static-docker0*
# systemctl restart systemd-networkd.service
# systemctl restart docker

Modify whatever you want, I left 192.168.3.0/24 as that will work in my network.

Here are other links that helped along the journey.

There is a few ideas.
http://www.vmtocloud.com/how-to-enable-docker-remote-api-on-photon-os/

Showed how to adjust the docker networking, didn’t persist reboots though
https://support.zenoss.com/hc/en-us/articles/203582809-How-to-Change-the-Default-Docker-Subnet

Known issue, I applied this hotfix to vRA
https://kb.vmware.com/selfservice/microsites/search.do?language=en_US&cmd=displayKC&externalId=2148212

Enjoy,

Steve Schofield
https://vsteve.me

vRO workflows

<< back to main article

Download vRO package

Download vro-org.vsteve.me.package on Github

There are two workflows, one action you’ll import into vRO.  The workflows are used by the Event Broker in vRA to setup networking on .  The workflows are available to download.

Go to the landing page on vRA

2017-01-01_20-27-08

Download vRealize Orchestrator client

Type in user id and password

default is vcoadmin / vcoadmin

You’ll need Java

2017-01-01_20-30-51

Import package

Here is an article by Jonathan Medd to import a packages into vRO

2017-01-01_20-37-26

Adjust the root password on the Template-vRO template.

The setting is on vRO Run in Guest workflow

image

Back to vRA to setup Event Broker

Enjoy,

Steve Schofield
http://vsteve.me

Setup Template-vRO catalog item

<< back to main article

Here are steps to publish in the vRO template as a catalog item.    if you want more information on setting up Catalog items, Entitlements, check out Eric Shanks vRealize Automation guide.

Create a Service called vRO-App

2017-01-01_19-56-22

Go to Catalog items,

Select Template-vRO blueprint

2017-01-01_19-58-09

Add catalog item to the vRO-App Service

2017-01-01_19-59-29

Entitlement the item to vRO-App service.   For this example, I entitled just the configuration administrators (configurationadmin by default).  If you have this attached to a LDAP source, you could provision based on LDAP group membership.

2017-01-01_20-02-02

The Template-vRO72 catalog item will show up after entitled.

2017-01-01_20-04-20

Enjoy,

Steve Schofield
http://vsteve.me

vRO setup Event Broker

<< back to main article

vRA introduced the Event Broker feature.   We’ll setup a subscription to fire to run the vRO-Assign-Network workflow.

Click New

2017-01-02_21-09-24

Select Machine.Provisioning option

2017-01-02_21-09-45

Add the following conditions or adjust to fix your environment

2017-01-02_21-10-10

Select vRO-Assign-Network workflow

2017-01-02_21-10-29

Click Finish

2017-01-02_21-11-20

Don’t forget to Publish to make the subscription live.

Enjoy,

Steve Schofield
http://vsteve.me


2017-01-02_21-09-24

Add Key-State-Changes Property group, add to blueprint

<< back to main article

vRO needs the payload properties bucket, which contains all information about the request, including network information.   There are custom properties added to blueprints to expose this information.

The attacked example are the list of properties I use on blueprints.  I encourage you to investigate each item to understand which data is made available.

Go to Administration > Property Groups

2017-01-01_21-05-15

Add to the property group

2017-01-01_21-00-12

Save

2017-01-01_21-06-43

Edit your blueprint

Add on custom properties page, Property Groups

We will cover in another article how to expose the properties and use meta data,.

2017-01-01_21-07-07

Enjoy,

Steve Schofield
http://vsteve.me