One of the features IISLogs has to offer is the ability to save ZIP files to a remote server. In most scenarios, the reason an administrator wants to save files to a remote share vs. on the local machine is either they have a website running on a web-farm (multiple servers hosting the same site) or multiple servers with many websites to copy the log files to a central server for processing by a statistics program. This central server could be a standard file server or NAS (Network attached storage) server. Whatever the reason, it is useful if you require the need to centralize all your IIS log files. In most cases however, keeping the log files on the local server is sufficient. We recommend evaluating all your requirements before attempting to store all log files on a central server.
This article assumes you have downloaded and installed IISLogs. If not, here is a step-by-step instructions of installing IISLogs. http://www.iislogs.com/help/123goconfigure.htm IISLogs version 1.0 takes advantage of the built-in networking features of Windows Server by accessing a server via the IP Address or NetBIOS machine name. To access a network share, map a drive or from the RUN window type in \ServerNameSharename. IISLogs can access machines that are a stand-alone, part of a workgroup or a member server of an Active Directory domain.
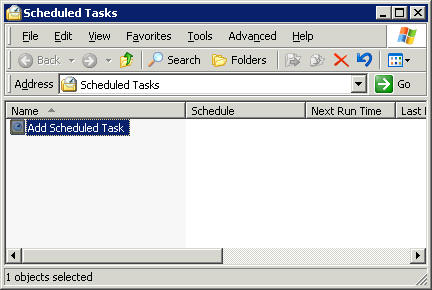
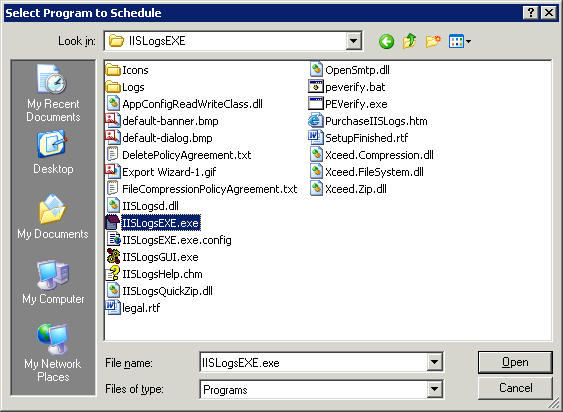
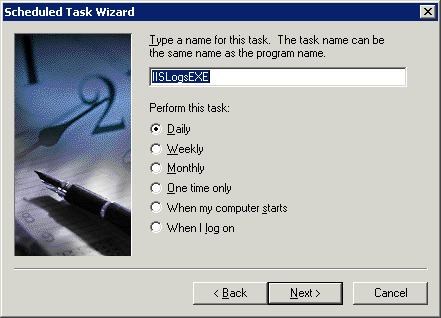
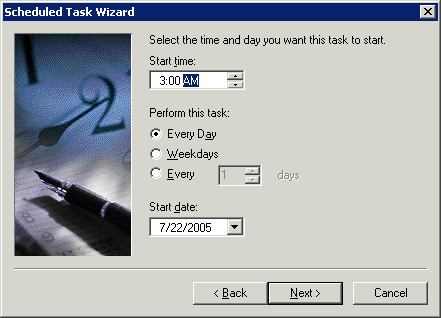
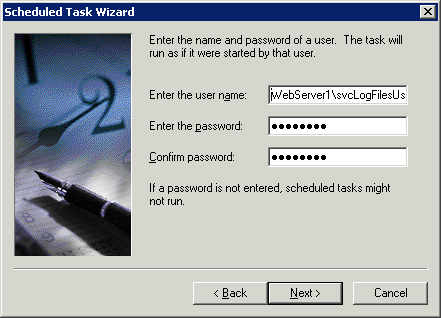
When using this method to save log files on a remote server, additional steps have to be taken to ensure the proper folder permissions are applied. Because IISLogs is saving files to a remote Windows Share, all the normal Windows security principals applies. This is because one process running on one server is accessing and writing files on another server, the ‘user id’ needs rights to put the log files on the remote file share. If you are using IISLogs Stand-Alone EXE, this is normally started by a scheduled task using the built-in Windows Task Scheduler service. When the scheduled task was configured, it was set to run under a certain user id. This also applies to the IISLogs Windows Service version, by default services run as LOCAL SYSTEM, Local Service or Network Service. In our example we created a user id called ‘svcLogFilesUser’ that will run scheduled process. This also could be used to run the Service version.
Introduction
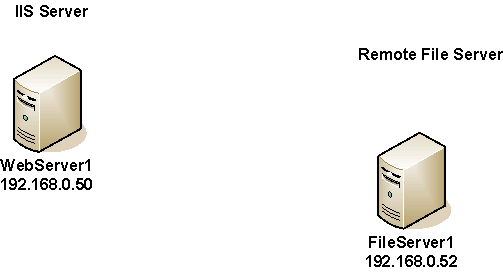
Here is scenario of how to get two workgroup machines configured. Here is an overview of the server architecture.

Notice in our example we have two servers, one named ‘WebServer1’ and will represent the server that has websites configured and a copy of IISLogsEXE installed. The second server is called ‘FileServer1’ and will be the central file server that has a share called ‘wwwlogs’. This share will be accessed by using a couple of methods \192.168.0.52wwwlogs or \FileServer1wwwlogs. One of these two paths will be put into the IISLogsGUI section where to store the log files.
Here is a high-level step-by-step instructions for configuration
Determine which user will be used to run IISLogs.
For this example we created a user called ‘svcLogFilesUser’ on both machines. This user id has the same password on both machines, this is required if you are using local accounts vs. a domain user id. If both machines are part of the same Active Directory domain and a domain user id is used and has proper folder permissions, there is no need to create the local user accounts. We also added the user id to the local administrators group on the ‘WebServer1’ machine, this is needed to run the scheduled task.
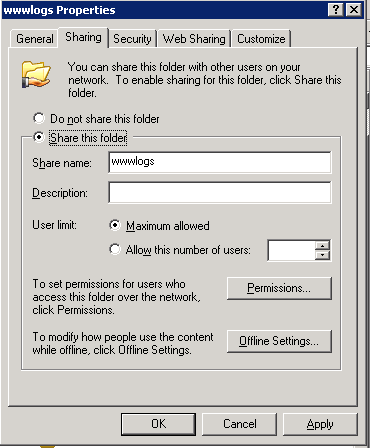
Create the Share on the remote server (FileServer1).
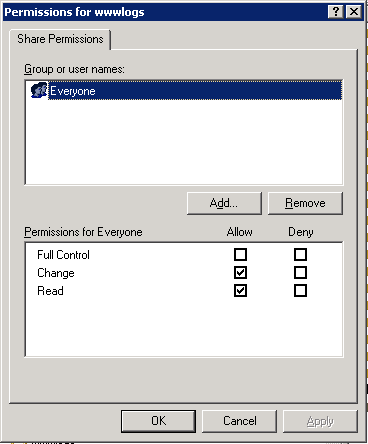
Click Permissions button, verify the ‘EVERYONE’ group or ‘USER ID’ has at least Change permissions. By default all created shares the ‘EVERYONE’ group only has ‘READ’ permissions.
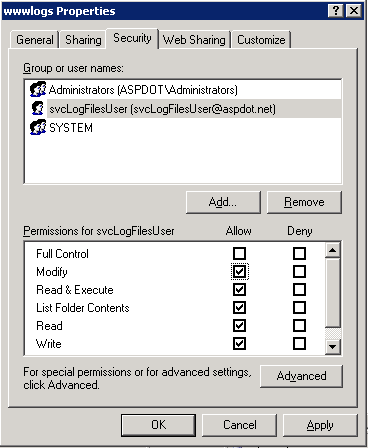
Grant the proper folder permissions to the user id or service account that will be writing the log files to this folder.
Installing and configuring IISLogs
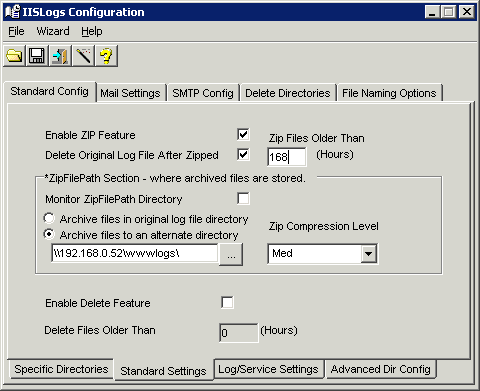
Install and configure IISLogs on WebServer1. During the wizard install place the path to remote share in the box listed below, (\192.168.0.52wwwlogs) in our example. This also can be done in IISLogGUI after the initial install is done. In our example it is pointing to our example ‘FileServer1’ shared called ‘wwwlogs’. Make sure the trailing backslash ” is there or IISLogs will unable to copy the log files to the remote share.
Test out the configuration
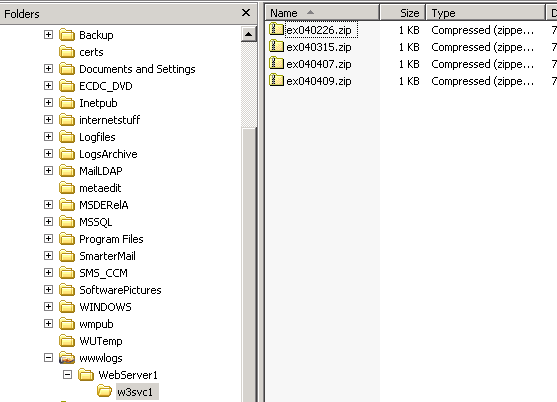
In version 1.0 of IISLogs, the remote path is hard-coded on the remote file share as ShareNameWebServerNameSiteID. In our example below IISLogs automatically created the ‘WebServer1’ and ‘w3svc1’ directories below the ‘wwwlogs’ folder. This ensures multiple servers can write to the central file server, this can not be changed and was designed in version 1.0. We are considering a more flexible solution in future releases.
Troubleshooting
From the web server, can you ping the IP Address or Machine name from a command prompt. ( ping 192.168.0.52 in our example above)
Verify in IISLogsGUI the ‘Archive files to alternate directory’ has a trailing slash. I.E. \ServerNameShareName
Verify the WORKSTATION and SERVER services are running on both machines. These are needed for windows-based networking using shares
Verify the user id being used for the scheduled task or to run the service has the proper folder permissions on the remote machine.
Make sure there is no firewall between the two machines, if there is a firewall at least grant the standard windows networking ports are open at least to the remote server (ports 135, 445). Also might need to grant ports (137,138,139).
Look in the ‘errorLogging.txt’ file. This is the IISLogs error log file that logs errors when IISLogsEXE is running. The path to this file is \InstallPathIISLogsEXELogserrorLogging.txt.