Change Docker default network to persist reboots and vRealize Automation 7.2

image

Containers are coming to a company near you! Containers are all the rage.  They are one of the hottest technologies in IT.  In all seriousness, all technologies have to mature, fit a business need.  Docker is a leading company in this space.

Within vRealize Automation 7.2, there is a container option.  Here are docs about containers and vRealize Automation 7.2.   As a vRA admin, I want to understand all features.  To help achieve my goal, I wanted to setup a catalog item similar to these articles.

Mark’s article was very helpful.   His article uses a DHCP scope (which is ok) and default networking in Photon assumes DHCP.  My article uses a vRO workflow, script on the template to set networking based on ip settings handled by vRA.

My article is related to vRealize Orchestrator, but the concept is the same.  Maybe I’ll blog my Photon example later although it’s similar to Mark’s article.   Here are my Photon workflows and addnetwork.sh I used on Photon vRA example

Regardless of how you setup your template, one of the features of Docker has it’s own internal networking.  The default is 172.17.0.0  (more info here). For some enterprises, this can conflict with existing non-routed internet address ranges ( 10.x, 172.x, and 192.168.x).

I ran into this and needed to adjust my default docker network.   My docker network wouldn’t persist reboots.  I initially found out how to change default docker network, but it wouldn’t persist a reboot.  (Links are listed below)

I wanted to setup my Photon template, used by vRA, with a persistent docker network that wouldn’t revert back to 172.17.x.x after reboots.  Follow Marks or my article to setup a Photon template, catalog items in vRA, then adjust your Photon template using instructions below.

After working with VMware and some experimentation.  This worked for me.

Photon OS use systemd-networkd to manage the network. Here is the external documentation on how to setup a bridge with systemd-networkd: https://wiki.archlinux.org/index.php/Systemd-networkd#Bridge_interface

Following steps:

# cd /etc/systemd/network
# vi 10-static-docker0.netdev

[NetDev]
Name=docker0
Kind=bridge

# vi 10-static-docker0.network

[Match]
Name=docker0
[Network]
Address=192.168.3.0/24

# chmod 755 10-static-docker0*
# systemctl restart systemd-networkd.service
# systemctl restart docker

Modify whatever you want, I left 192.168.3.0/24 as that will work in my network.

Here are other links that helped along the journey.

There is a few ideas.
http://www.vmtocloud.com/how-to-enable-docker-remote-api-on-photon-os/

Showed how to adjust the docker networking, didn’t persist reboots though
https://support.zenoss.com/hc/en-us/articles/203582809-How-to-Change-the-Default-Docker-Subnet

Known issue, I applied this hotfix to vRA
https://kb.vmware.com/selfservice/microsites/search.do?language=en_US&cmd=displayKC&externalId=2148212

Enjoy,

Steve Schofield
https://vsteve.me
vRO workflows

<< back to main article

Download vRO package

Download vro-org.vsteve.me.package on Github

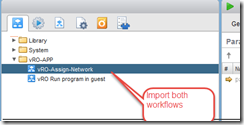
There are two workflows, one action you’ll import into vRO.  The workflows are used by the Event Broker in vRA to setup networking on .  The workflows are available to download.

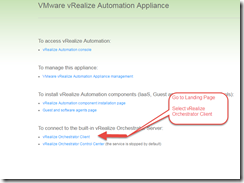
Go to the landing page on vRA

2017-01-01_20-27-08

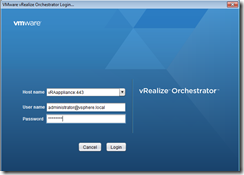
Download vRealize Orchestrator client

Type in user id and password

default is vcoadmin / vcoadmin

You’ll need Java

2017-01-01_20-30-51

Import package

Here is an article by Jonathan Medd to import a packages into vRO

2017-01-01_20-37-26

Adjust the root password on the Template-vRO template.

The setting is on vRO Run in Guest workflow

image

Back to vRA to setup Event Broker

Enjoy,

Steve Schofield
http://vsteve.me
Setup Template-vRO catalog item

<< back to main article

Here are steps to publish in the vRO template as a catalog item.    if you want more information on setting up Catalog items, Entitlements, check out Eric Shanks vRealize Automation guide.

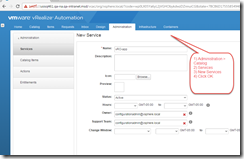
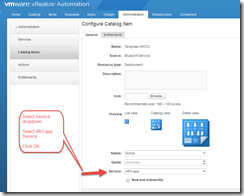
Create a Service called vRO-App

2017-01-01_19-56-22

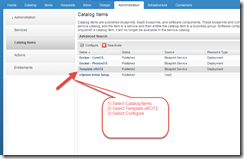
Go to Catalog items,

Select Template-vRO blueprint

2017-01-01_19-58-09

Add catalog item to the vRO-App Service

2017-01-01_19-59-29

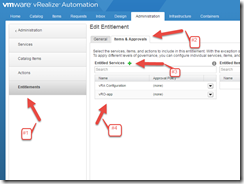
Entitlement the item to vRO-App service.   For this example, I entitled just the configuration administrators (configurationadmin by default).  If you have this attached to a LDAP source, you could provision based on LDAP group membership.

2017-01-01_20-02-02

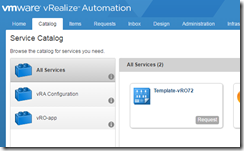
The Template-vRO72 catalog item will show up after entitled.

2017-01-01_20-04-20

Enjoy,

Steve Schofield
http://vsteve.me
vRO setup Event Broker

<< back to main article

vRA introduced the Event Broker feature.   We’ll setup a subscription to fire to run the vRO-Assign-Network workflow.

Click New

2017-01-02_21-09-24

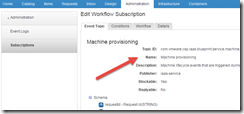
Select Machine.Provisioning option

2017-01-02_21-09-45

Add the following conditions or adjust to fix your environment

2017-01-02_21-10-10

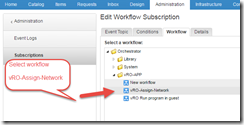
Select vRO-Assign-Network workflow

2017-01-02_21-10-29

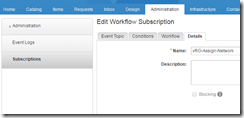
Click Finish

2017-01-02_21-11-20

Don’t forget to Publish to make the subscription live.

Enjoy,

Steve Schofield
http://vsteve.me


2017-01-02_21-09-24

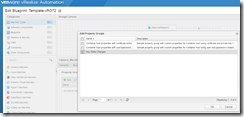
Add Key-State-Changes Property group, add to blueprint

<< back to main article

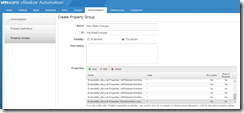
vRO needs the payload properties bucket, which contains all information about the request, including network information.   There are custom properties added to blueprints to expose this information.

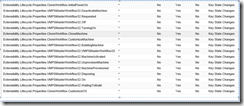
The attacked example are the list of properties I use on blueprints.  I encourage you to investigate each item to understand which data is made available.

Go to Administration > Property Groups

2017-01-01_21-05-15

Add to the property group

2017-01-01_21-00-12

Save

2017-01-01_21-06-43

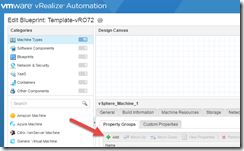
Edit your blueprint

Add on custom properties page, Property Groups

We will cover in another article how to expose the properties and use meta data,.

2017-01-01_21-07-07

Enjoy,

Steve Schofield
http://vsteve.me

Add Blueprint, network for Template-vRO7

<< back to main article

Sign-into vRA as account with permissions to create / publish blueprints, add items to catalog.

Click Design

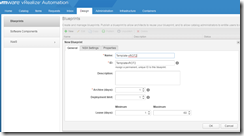
New Blueprint

I adjusted “1 to 60 days” option

2017-01-01_19-18-25

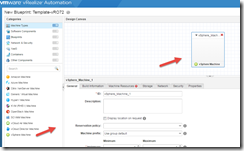
Drag vSphere Machine on canvas

2017-01-01_19-22-56

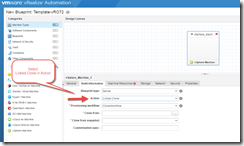
Select Build Information,

Change to Linked Clone in Action field

2017-01-01_19-23-35

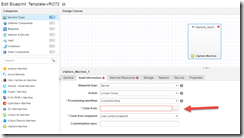
Select the “….”

2017-01-01_19-41-39

A popup window will appear

Select Template-vRO7

2017-01-01_19-41-12

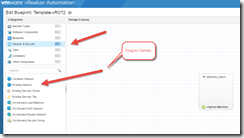
Select Network and Security

2017-01-01_19-46-46

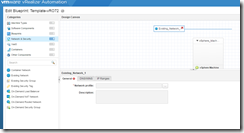
Drag existing network to canvas

2017-01-01_19-47-54

Select network profile

In our example, it’s internal network

2017-01-01_19-48-17

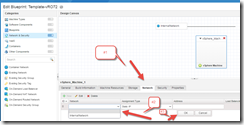
Select Network on Blueprint

Follow steps in picture

2017-01-01_19-51-07

Close Blueprint

Make sure Publish

2017-01-01_19-53-14

Enjoy,

Steve Schofield
http://vsteve.me
Add Script to Template-vRO7 VM

<< back to main article

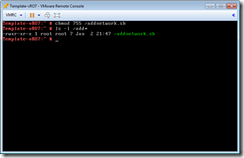
After the vRO OVF  is deployed and running.  Open the VM in VMRC (VMware Remote Console), login.  I add a bash shell script to the template vRO will execute to adjust network settings passed by vRA.  Once the script is added, permissions are adjusted, take a snapshot

Open VMRC, login as root

2017-01-02_16-44-33

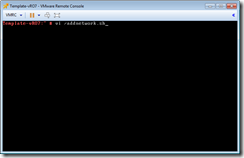
In VI, craate a file named addnetwork.sh placed on the root folder.   The file can be located in any folder, we just chose the root folder.

2017-01-02_16-45-25

Type settings listed in the image, or copy and paste from listed below

image

Type command to give vRO the ability to execute the script

Chmod 755 /addnetwork.sh

Notice perms after adjusting

2017-01-02_16-48-33

Last STEP

  • Shutdown VM
  • Take a single snapshot

image

—————————-

Code from step 3

mv /etc/HOSTNAME /etc/HOME.original
echo $1 >> /etc/HOSTNAME
mv /etc/sysconfig/networking/devices/ifcfg-eth0 /etc/sysconfig/networking/devices/ifcfg-eth0.original
echo “DEVICE=eth0” >> /etc/sysconfig/networking/devices/ifcfg-eth0
echo “BOOTPROTO=’static’” >> /etc/sysconfig/networking/devices/ifcfg-eth0
echo “STARTMODE=’auto’” >> /etc/sysconfig/networking/devices/ifcfg-eth0
echo “TYPE=Ethernet” >> /etc/sysconfig/networking/devices/ifcfg-eth0
echo “USERCONTROL=’no’” >> /etc/sysconfig/networking/devices/ifcfg-eth0
echo “IPADDR=’$2′” >> /etc/sysconfig/networking/devices/ifcfg-eth0
echo “NETMASK=’$3′” >> /etc/sysconfig/networking/devices/ifcfg-eth0
mv /etc/sysconfig/network/routes /etc/sysconfig/network/routes.original
echo “default $4 – -” >> /etc/sysconfig/network/routes
mv /etc/resolve.conf /etc/resolve.conf.original
echo “nameserver $5” >> /etc/resolve.conf
echo “nameserver $6” >> /etc/resolve.conf
echo “domain $7” >> /etc/resolve.conf
echo “search $7” >> /etc/resolve.conf
service network restart

Enjoy,

Steve Schofield
http://vsteve.me

Make sure Data Collection is working within vRA

<< back to main article

This is a short step.  There are a few assumptions

  • A connection to vCenter where Template-VRO7 is deployed
  • The vRA / vRO has connectivity and permissions to same vCenter where the Template was deployed
  • Reservations, Business groups and other items are setup
  • The Template-vRO7 vm deployed with a single snapshot (for linked clones)

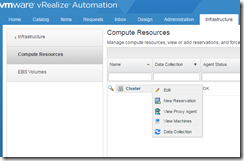
Sign into vRA with administration permissions, kick off a data collection

2017-01-01_19-12-24

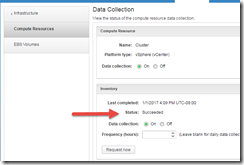
Look for a successful data collection, this will pull in the Template-VRO7 the blueprint will use.

2017-01-01_19-13-10

Enjoy,

Steve Schofield
http://vsteve.me
Import vRO appliance

<< back to main article

To import vRO OVF, I connected directly to a host running 6.5, which is deployed in a cluster attached to a 6.5 vCenter.  I ran into an SSL cert issue when trying to import through vCenter (HTML or Web client)

As a workaround, I imported directly to a VMHost running 6.5, browse to https://vmhostname/, login as root.  You’ll able to use the host client, which is HTML 5 based.

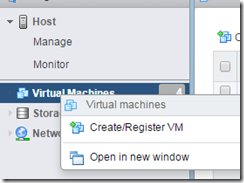
Go to Virtual Machines, right click and select Create / Register VM.  

1-2017-01-01_17-45-00

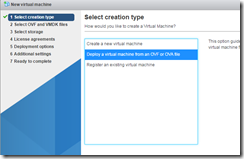
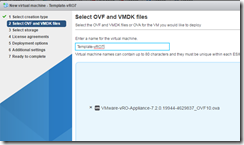
Select Deploy a virtual machine from an OVF or OVA file, browse where the OVF file is located

2-2017-01-01_17-45-48

Name Template-vRO7

3-2017-01-01_18-14-08

Select which Datastore where the OVF will be deployed.

4-2017-01-01_18-14-26

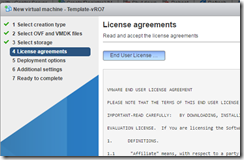
Accept License agreement (of course there is an EULA)

5-2017-01-01_18-14-46

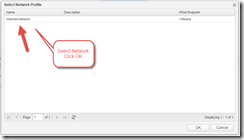
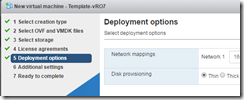
Select Network (vlan 16 in our example) and Disk Provisioning (Thin)

6-2017-01-01_18-15-13

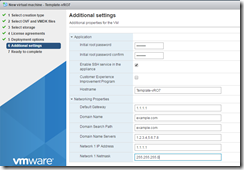
Additional settings.  The values in the image are settings I used, when the VM is being provisioned by vRA, there is a vRO workflow that executes a script on the host to adjust settings passed from vRA. The step executing the script is covered in another article

7-2017-01-01_18-16-24

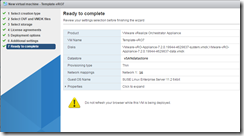
Review Settings and deploy the OVF

8-2017-01-01_18-16-40

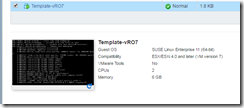
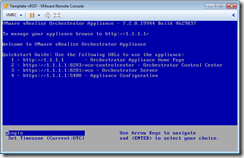
Power on the VM, there are adjustments to the machine.

9-2017-01-01_18-17-49

Step 1 complete

Enjoy,

Steve Schofield
http://vsteve.me
Publish vRealize Orchestrator OVF as a catalog offering in vRA 7.2


When I started with VMware vRealize Automation (vRA), one of the key items to learn is vRealize Orchestrator (aka vRO).   As with any new technology, I like to have a stand-alone environment to try things.

vRA does not support deploying OVF’s out of the box.  I wanted to make a catalog offering for vRO so I could try things over and over.  This exercise helped me learn vRA better as well as making vRO available for a few technicians who will be developing vRO workflows.  Here is a set of articles I used to create a catalog item.  Any questions, let me know at http://twitter.com/steveschofield
Disclaimer, with any VMware product, their licensing can vary.  I encourage you to check with your VMware rep with any questions.

Enjoy,

Steve Schofield
http://vsteve.me